See how two painted Drexel bachelor’s chests were stripped, sanded, and restored with a warm Light Oak finish, natural topcoat, and refreshed bronze hardware.
Beneath layers of old paint, this pair of Drexel bachelor’s chests still had a beautiful story to tell. Here is how careful stripping, patient sanding, and a soft natural finish transformed them into The Bellamy Pair.
Some furniture projects begin with a dramatic design plan. Others begin with a quieter goal: uncover what is already there and give it room to shine again.
That was the vision for this pair of vintage Drexel bachelor’s chests. Their classic proportions, generous storage, and beautiful details were still present, but layers of old paint concealed much of their original character. My client wanted a lighter, more natural look—one that would feel warm and updated without taking away from the timeless design.
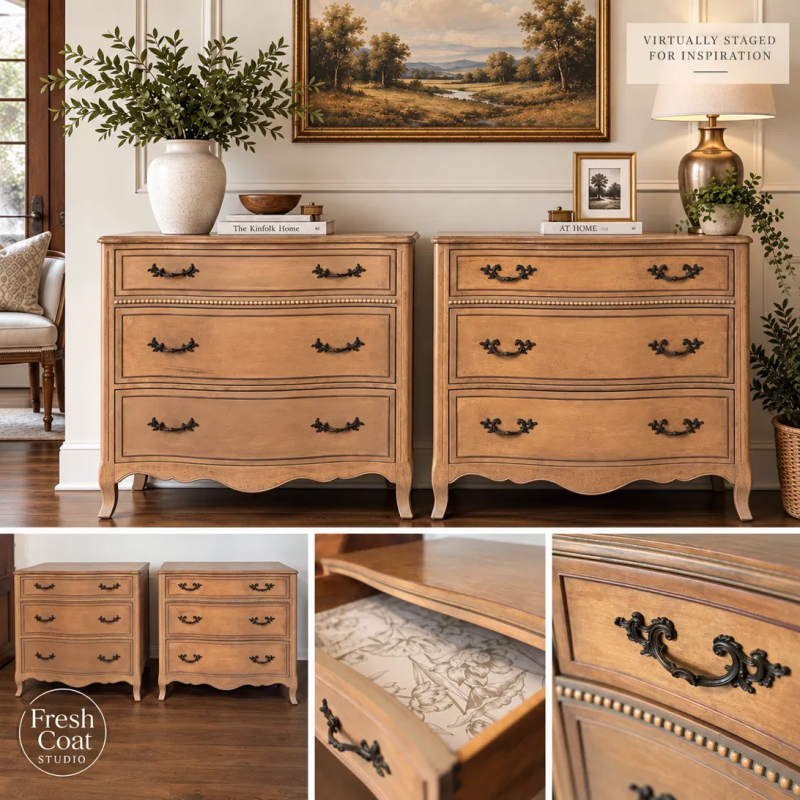
The process required far more time and patience than I first expected, but the finished pair made every careful step worthwhile. I named them The Bellamy Pair: two coordinating chests restored with a soft oak-toned finish, subtle bronze hardware, and a renewed appreciation for the craftsmanship beneath the paint.
Quick Overview
-
Removing multiple layers of old paint
-
Carefully sanding the wood surfaces
-
Applying Fusion Stain & Finishing Oil in Light Oak
-
Adding a final coat of Fusion Stain & Finishing Oil in Natural
-
Refreshing the original hardware with Rust-Oleum Rustic Mist
-
Cleaning and finishing the drawers for a polished final presentation
Project level: Advanced and time-intensive
Style: Traditional with a light, natural update
Final look: Warm wood tones with softly aged bronze hardware
Workshop Note: A matching pair often takes more than twice the work of a single piece. Each step must be repeated, and the two finished surfaces need to coordinate closely.
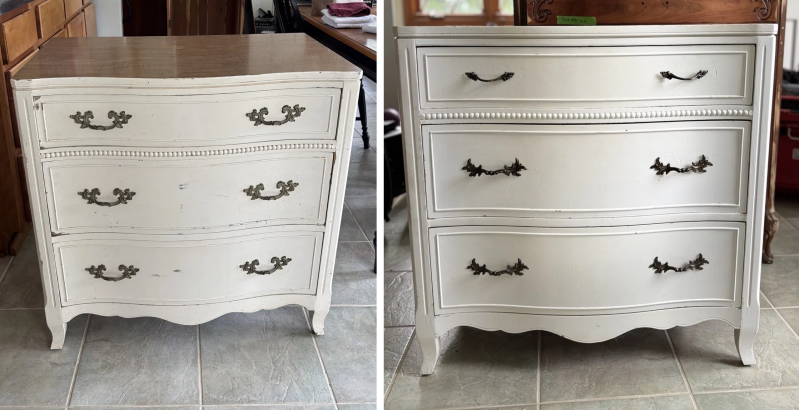
Here's how they arrived — dressed in layers of old white paint, with that classic French Provincial serpentine shape and gorgeous carved brass hardware hiding underneath. You could tell right away these were quality pieces. Drexel didn't cut corners, and I knew there was beautiful wood waiting under all that paint.
Do you see what I see? These are identical pieces--even have the same code numbers printed on the back. Look closely, there are two different sets of hardware! The dresser on the right, has a different set of hardware on the second and third drawers. The top drawer is a replacement hardware by the owner's family at some point in its history, I managed to find two matching drawer pulls for the top drawer of the right dresser.
Step 1: Removing the Layers of Paint
Stripping Down to the Good Stuff
The first order of business was getting all that old paint off. This was not a quick process — there were multiple layers to work through, and I wanted to be careful not to damage the detailing along the drawer fronts and that pretty beaded trim between the drawers. Lots of stripping, lots of sanding, and a little patience.
The most demanding part of this project was removing the previous painted finishes. There was no quick shortcut. The old coatings had to be loosened and lifted carefully, working in manageable sections and paying close attention to edges, corners, trim, and recessed details.
Paint removal can be unpredictable. Some areas release easily, while others seem determined to hold on to every last bit of finish. Rushing this stage can damage the wood beneath, so I worked gradually and repeated the process wherever necessary.
This was the point when the project became a true lesson in patience. Restoring previously painted furniture is often much more labor-intensive than the finished photographs reveal—but the preparation determines the quality of everything that follows.
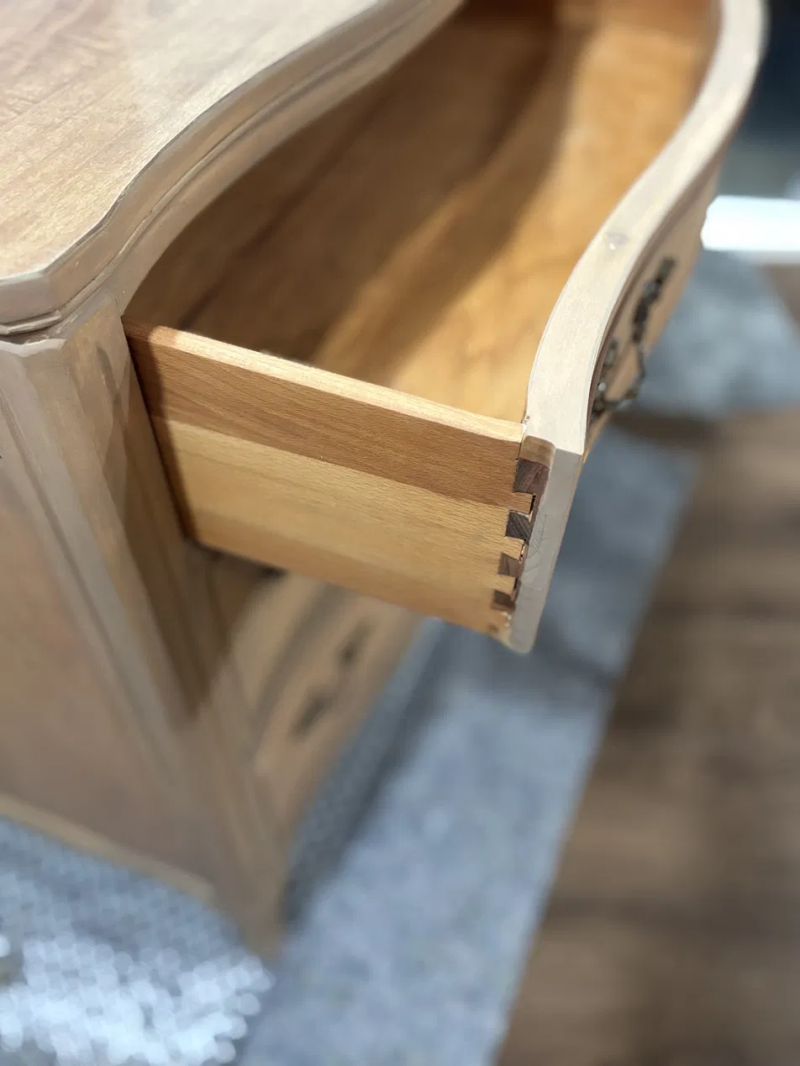
Once I finally got down to raw wood, it was worth every bit of elbow grease! The grain on these is gorgeous, and the shape of the case just sings once you can actually see the wood again instead of a painted-over silhouette.
Step 2: Sanding Back to a Clean, Even Surface
Once the majority of the paint had been removed, sanding revealed the condition and character of the wood more clearly. I sanded the large flat areas carefully and used more controlled methods around edges and detailed sections.
The purpose was not to make these vintage chests look newly manufactured. It was to create an even, well-prepared surface while preserving their age and character. I worked through the necessary sanding stages until the remaining finish, residue, and sanding marks were removed and the wood felt smooth and ready to accept the new finish.
Sanding a previously painted piece requires restraint. Aggressive sanding can soften crisp edges or damage veneer, so progress has to be checked frequently.
Fresh Coat Tip: Let the surface guide you. Veneer, edges, and detailed areas may require lighter pressure and more hand sanding than broad, flat sections.
Step 3: Testing the New Finish
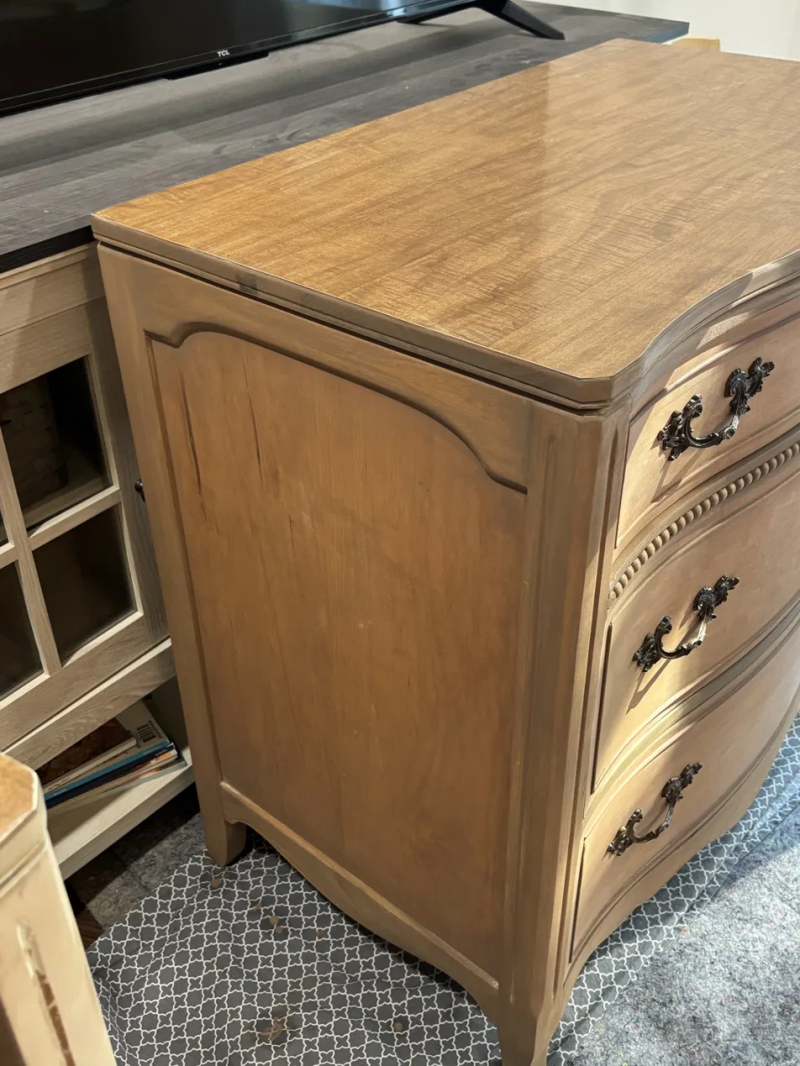
With the chests stripped and sanded, it was time to choose the tone. The goal was a natural finish that would brighten the pair while adding enough warmth to complement their traditional design.
I selected Fusion Stain & Finishing Oil in Light Oak for the color layer. Before committing to the full exterior, I tested the finish in a less noticeable area. Wood tone and porosity can vary—even across two matching pieces—so testing first is an important part of achieving a consistent result.
The Light Oak softened the raw wood and gave it a warm, understated color without making the chests appear dark or heavy.
Step 4: Applying Light Oak Stain & Finishing Oil
I applied the Light Oak finish in thin, controlled coats, working with the grain and wiping away the excess according to the product directions. Thin application was especially important. Too much oil-based finish can lead to uneven color, extended drying time, or a tacky surface.
Each section was checked as I worked so that the tone remained balanced across the tops, drawer fronts, sides, and frames—and from one chest to the other. After the first applications had dried, the wood had a gentle, natural warmth that allowed the grain and construction details to become the focus again.
Fresh Coat Tip: Do not assume matching furniture will absorb stain identically. Compare the pieces throughout the application and make small adjustments as you go.
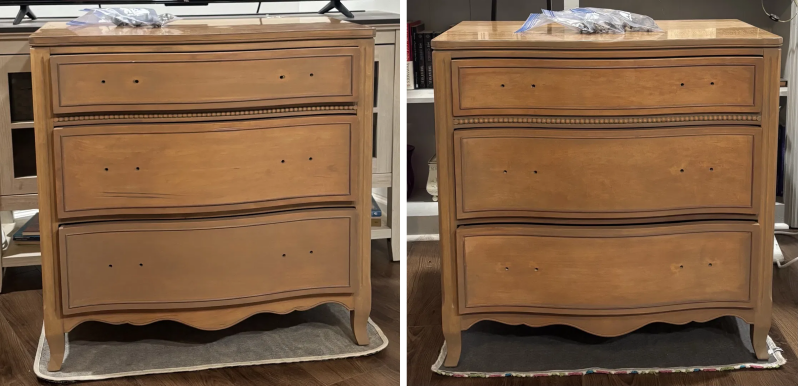
Step 5: Adding a Final Natural Coat
For the final coat, I used Fusion Stain & Finishing Oil in Natural. This added protection and a soft, finished appearance without significantly deepening the color created by the Light Oak.
The Natural coat gave the surfaces a subtle richness and helped the pair feel complete. The result was not overly glossy or heavily stained. Instead, the finish emphasized the wood grain and gave the chests a warm, quietly refined look.
After the final application, I allowed the finish time to dry and begin curing before reinstalling the hardware and preparing the chests for delivery. Note: It can take 2 to 3 days for the finish to dry- I usually let pieces sit for 24 to 48 hours before adding another coat or preparing for delivery. It should feel smooth to the touch, not tacky.
I love how this two-step method lets you build depth (2 layers of Light Oak and two layers of Natural Fusion Stain and Finish Oil — it doesn't look flat or stained-in-a-box like a lot of one-and-done products do.
Step 6: Refreshing the Original Hardware
The original Drexel hardware suited the scale and period of the chests, so replacing it was unnecessary. A refreshed finish was all it needed.
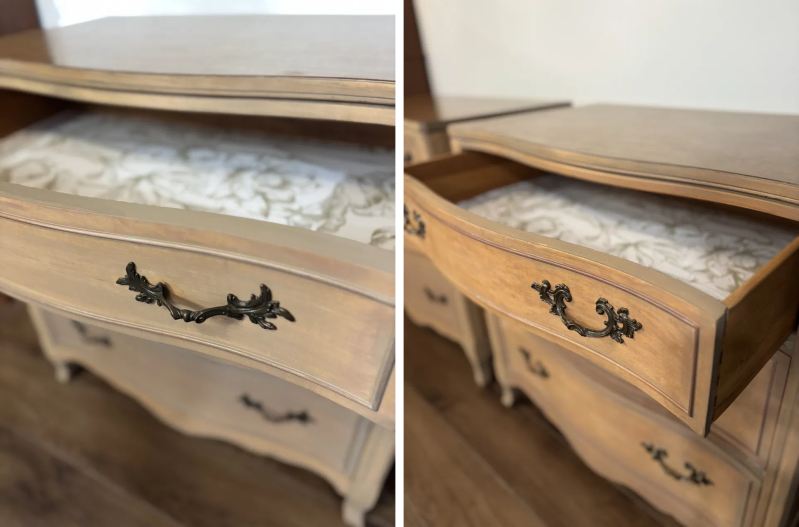
After cleaning and preparing the handles, I sprayed them with Rust-Oleum Rustic Mist. The warm, softly aged bronze color complements the Light Oak beautifully. It provides definition against the wood without creating a stark contrast or making the hardware look overly new.
Keeping the original handles also preserved an important part of the chests’ identity. Once reinstalled, they looked intentional, updated, and completely at home on the restored pair.
The Little Details
I always love lining drawers before I call a piece finished — it's a small touch, but it makes opening a drawer feel like a little surprise every time.
The Final Reveal
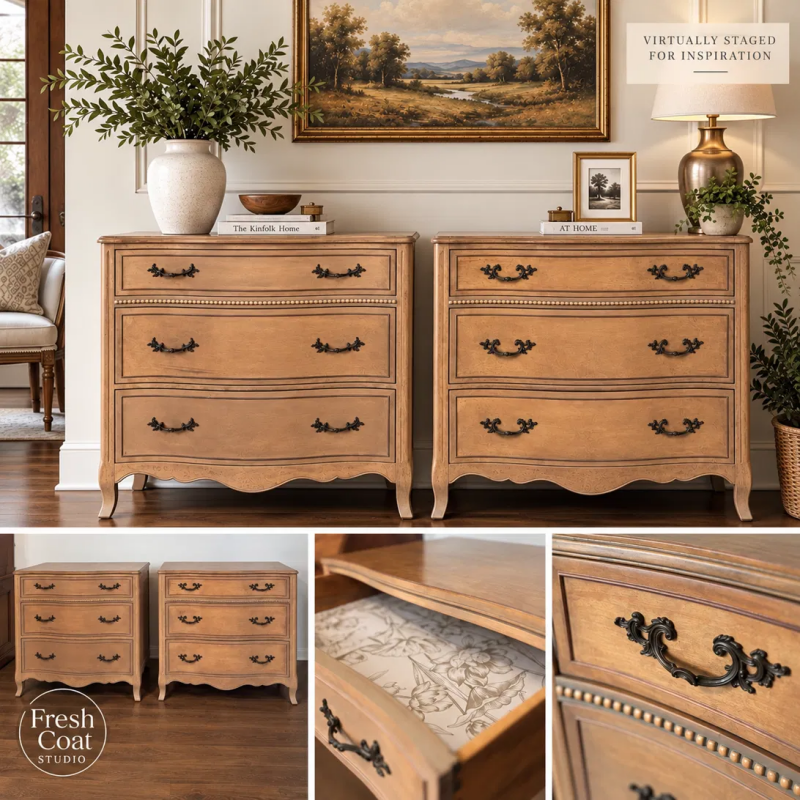
The completed chests feel lighter, warmer, and more refined, but they still look unmistakably vintage. Their graceful shape and original hardware remain the stars; the new finish simply allows those details to be seen again.
What had been hidden beneath layers of paint is now part of the design. The Light Oak added warmth, the Natural final coat created a soft finish, and the Rustic Mist hardware brought just enough depth and contrast.
Most importantly, the pair still belongs together. Matching furniture does not have to be perfectly identical in every variation of grain and tone. Those subtle differences are part of working with real wood and vintage pieces. A successful restoration creates harmony while respecting what makes each piece unique.
What this project has taught me:
-
Previously painted furniture can require significantly more labor than it first appears.
-
Careful preparation is the foundation of a beautiful natural finish.
-
Veneer and detailed edges require patience and a lighter touch.
-
Matching pieces should be evaluated side by side throughout the finishing process.
-
Original hardware is often worth preserving when its scale and style suit the furniture.
-
A restored finish does not need to erase every sign of age to be beautiful.
This project took many hours, but seeing the chests together in their finished state—and knowing they were returning to a client who truly appreciated the transformation—made the work meaningful.
I am just so happy with how "The Bellamy" turned out. That serpentine front, the original dovetail construction, the warmth of the Light Oak and Natural stain layered together, and the softly weathered hardware — it all came together into something that feels both vintage and fresh at the same time. These would be perfect flanking a bed as nightstands, or standing in as a stylish console in an entryway.
If you have a piece like this tucked away — inherited, thrifted, or just collecting dust in a spare room — don't be afraid to strip it back and see what's underneath. You never know what kind of dovetails are waiting for you.
Until next time,
Fresh Coat Studio
Add comment
Comments